TIPS FOR FINISHING AND SEWING NEEDLEPOINT
We hope that these tips for Finishing and Sewing Needlepoint will help you complete your needlepoint project with pride!
You're almost finished! This last step depends on your sewing skills.
If you don’t feel confident finishing needlepoint yourself,
get a professional!
It’s worth it!
Go to the following sections for suggestions on how to finish your labour of love:
ZIVA VOGUE:
What is your tip when making up fashion items like these?
Click here to share your making up tips and experiences with our visitors!
ZIVA CASA:
What are your tips for finishing items like these for your home?
Click here and share with our visitors how you finished your home project.
GENERAL TIPS ON FINISHING
AND SEWING NEEDLEPOINT
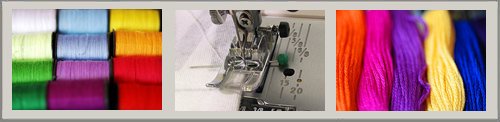
• A regular domestic sewing machine can normally handle the weight and thickness of your final tapestry.
• Always allow a canvas seam of at least ½ inch, to ensure that the needlepoint stitches and canvas don’t unravel.
• Do not trim the canvas close to the needlepoint stitches until after you have sewn the tapestry to its backing to prevent unravelling. In fact, I like to keep as big a seam as possible, even after sewing.
• Some recommend that you should stitch a couple of extra needlepoint rows around the perimeter of your piece to prevent the canvas from showing when sewn together.
In theory, I agree, but for me the edges become too bulky this way. Also if your tapestry edge is curved or irregular, its shape could be lost.
• If you are worried about ruining your finished stitching or you do not have the necessary sewing skills, you can always use a reputable upholsterer or seamstress who could make up your pieces.
I always make this recommendation to my clients.
• It’s advisable to have a professional lined up before you start any large project.
For example, you may want to discuss the final shape of your tapestry upholstery, the weight of fabric for the backing of a handbag, or how to finish off a final edge, etc., while you’re still at the stitching phase.
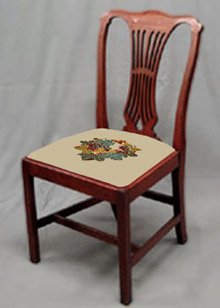
• When creating a needlepoint seat cover design for a favourite chair, talk to your upholsterer and have him create an upholstery pattern for you to work from.
You can also create your own pattern by taking off the existing upholstery and tracing the shape.
ZIVA VOGUE
SEWING NEEDLEPOINT HANDBAGS:
PROFESSIONAL HELP
When I provide my clients with my handpainted design on canvas, I always include a drawing for the suggested making up of the finished tapestry.
For the following handbags, my clients, who lacked the necessary sewing skills, hired professional local seamstresses.
They used my drawings for making up the handbags, which made it straightforward for the seamstress.
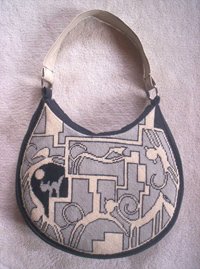
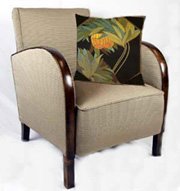
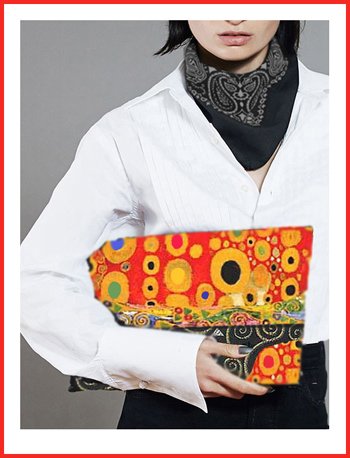
For the ‘Cat on the Hot Tin Roof’ handbag, my client (with my help!) selected a light-weight black wool fabric for the back and sides of the bag.
She added two needlepoint back pockets which were part of her ZIVA kit.
She perfectly matched the leather strap with the wheat colour in the tapestry. The athracite-coloured rings attaching the strap to the bag adds a little bling!
A very elegant ART DECO result!
Click on photo to learn more about this whimsical handbag design.
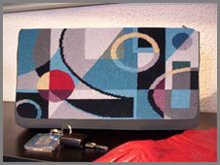
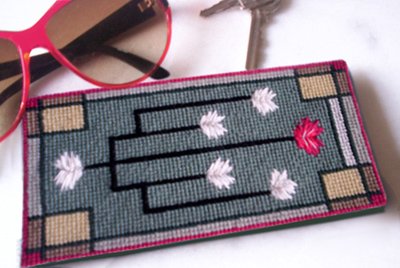
This ‘Black Chrysler’ handbag, had black piping sewn on the edges to protect it.
I like this detail because it cleanly frames the crisp graphic nature of the design.
Grey wool fabric was chosen for the back of the bag, complete with two pockets for a cell phone, keys, etc.
As per my design, a smaller separate zippered bag was made up in fabric in a half-round shape, and then inserted securely into the bag to provide a safe place for my client’s personal items.
Click on photo to learn about the extraordinary inspiration for this handbag design!
SEWING NEEDLEPOINT HANDBAGS:
DO IT YOURSELF!
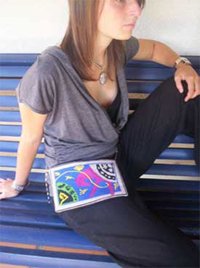
If you have some sewing needlepoint skills, take the pleasure in finishing your needlepoint creation yourself!
I found that my needlepoint belt bags are not difficult to assemble... just sew on the fabric backing, add a zipper or Velcro or a snap at the top, a channel at the back for the belt to slip through, and you’re finished!
Click on photo to see all these vibrant belt bags!
HANDBAG AND CLUTCH BAG PATTERNS
On the internet or at your favourite fabric store, you can purchase handbag and clutch bag patterns from well-know pattern companies with their step-by-step instructions.
They take the worry out of creating a pattern yourself, and guide you through the sewing process! Great idea!
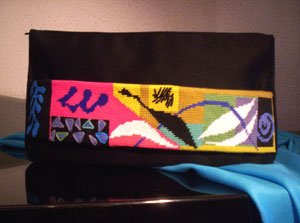
So I decided to create some clutch bag designs, based on readily available patterns to make it as easy as possible for you to sew your own clutch bag!
Click on the photo to see two new clutch bag designs. They are easy to stitch and easy to sew yourself!
FINISHING AND SEWING
NEEDLEPOINT BELTS
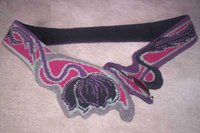
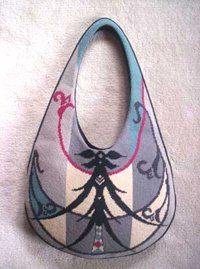
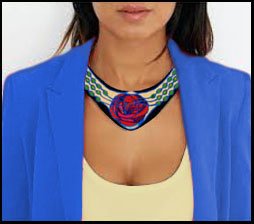
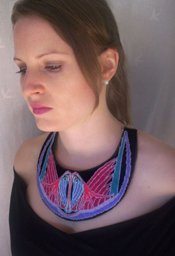
ZIVA Black Tulip Belt
My client wanted me to design a unique belt shape. I was concerned that the curved edges I created would be very vulnerable to wear.
So I recommended the ‘Loop’ Edge Stitch (see below) where she ‘looped’ tapestry yarn over the finished edges with a needlepoint needle in the same yarn colours as the belt.
That did the trick!
I designed the belt so that a ‘Velcro’ tab was added to the smaller end of the belt, to easily attach the two ends.
Click on photo to learn more about this unique belt design
EDGE STITCHES
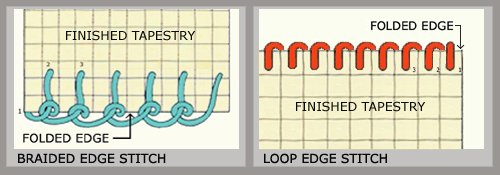
For the straight edges of a regularly shaped belt you could add a braided edge stitch or loop edge stitch to make it more hard wearing. See diagram above.
These stitches can, of course, work anywhere where the edges of your finished piece are going to be left exposed.
Click here to see how the ’Loop’ Edge Stitch was used to finish my new needlepoint bracelets designs.
It’s done after you’ve blocked your piece and have trimmed the excess canvas, leaving enough (approx ½ “or 1.25 cm) to fold the spare canvas back and be ‘caught’ by this stitch.
Then you work it as shown with needlepoint yarn in a matching or contrasting colour.
To complete your belt there is an amazing variety of suitable belt buckles available at craft shops or on the web. Explore!
Some craft and needlepoint shops also provide making up services for belts, handbags or any other fashion project you’ve stitched.
But we've only
scratched the surface with these sewing needlepoint tips!
HOW DID YOU FINISH
YOUR BELT, HANDBAG OR OTHER FASHION ACCESSORY?
Share Your Tips or Experiences with Us!
What fabric did you use for the backing of your handbag?
Have you found a good source for handbag handles?
Did you make the handbag yourself or did you use a professional?
How did you finish your belt edges? How did you add a buckle to your belt?
Share your experiences or tips with all of us! There are always new ideas to learn from one another!
How Did Others Finish Their Needlepoint Fashion Accessories?
Click on the links below from visitors to this page and read about their unique tips for finishing their favourite needlepoint handbag or other fashion accessory!
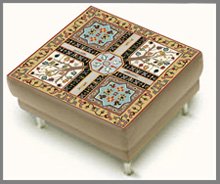
Does anyone have any tips for finishing round and square needlepoint hinged boxes 
I’m wondering if you use 1/4 inch foam board for square boxes and what to use for round boxes. Thank you!
ZIVA CASA
FINISHING NEEDLEPOINT UPHOLSTERY
SEAT COVERS
I have always sewn my own cushions and belt bags.
But I had a professional upholsterer finish the Tabriz piano bench for me.
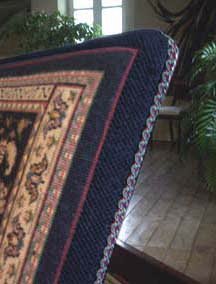 As you see from the photos, the one row of dark red stitching on the outside border has been purposely positioned inside the edges and corners of the piano bench. |
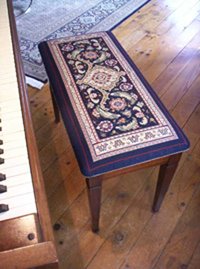 I wanted the pattern ‘to sit’ on the top of the bench, so the whole design would be visible, and resemble a small oriental carpet. |
Before I started stitching the dark blue around the perimeter, I discussed the final size of tapestry and the finishing details with the upholsterer.
Also discuss with your upholsterer whether he prefers to block your needlework or he wants you to do it.
My upholsterer fitted the tapestry perfectly and added an elegant finishing braid to the edges for protection. (photo above left)
It’s a family heirloom and I wanted it done properly! I’m no upholsterer!
After all your work stitching, you don’t want the final product to look amateur! But if you have the proper skills, take it on!
SEAT PADS
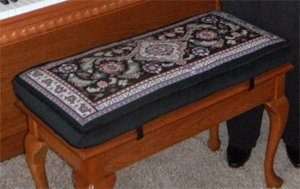
If you want your finished needlepoint to sit on the wood bench seat, this is an excellent solution.
One of my clients had her upholsterer finish her Tabriz piano bench as a seat pad, and added straps in the same fabric for ease of opening the lid.
It’s also very practical if you have to remove the tapestry to have it cleaned!
FINISHING AND SEWING NEEDLEPOINT
AREA RUGS
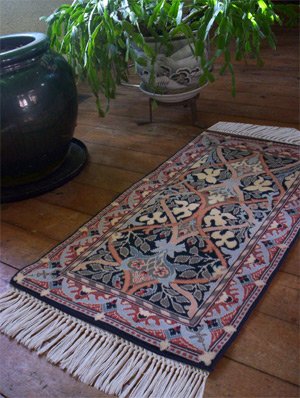
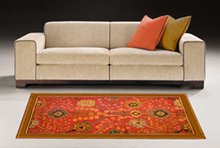
After blocking, I turned the raw canvas to the back, mitred its corners, and folded on completed stitching so that the edges look finished.
Or you could fold the canvas at the edges of the needlepoint, leaving two raw threads and work the ‘Loop’ Edge Stitch (see above) .
I hand-stitched the back of the tapestry with pre-shrunk dark blue cotton lining, and added a simple white cotton carpet fringe at each end, just like the original William Morris carpet.
Click on photo for more detail about this 'Morris Mineur' area rug.
Don't forget, for safety purposes, to put your new area rug on an anti-slip underpad. It also helps reduce the wear on the yarn fibres and canvas.
SEWING NEEDLEPOINT CUSHIONS
OR PILLOWS
• Sewing needlepoint cushions or pillows is much more straightforward to sew...usually a square or a rectangle! So even with minimal sewing skills, you should be able to tackle sewing needlepoint cushions.
• Choose the colour of your backing fabric with care. If you are in doubt, choose a colour that matches the background colour of your needlepoint.
• If you do not wish to insert a zipper in the backing of your cushion, you can merely leave an opening by overlapping two pieces of backing and fasten by Velcro or decorative buttons.
If you have some sewing skills, you can edge the cushion with a contrasting piping or a flange.
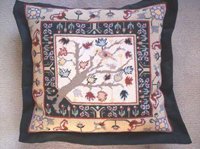
With this Khosro Cushion at right, I suggested that my client add a black flange the same width as the interior black border.
This detail acts as a very effective ‘frame’ to the final cushion.
Click on photo to learn about this cushion design.
FINISHING AND SEWING
NEEDLEPOINT ART
Here are a few ideas and suggestions for finishing and sewing needlepoint art that may help get you thinking what will work in your home:
WALL HANGINGS
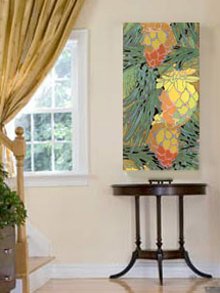
A very clever way and less expensive than traditional framing is having a piece of needlepoint made into a wall hanging.
NOTE: Friends, admiring your handiwork will want to touch it, so keep that in mind when determining where you might want to hang it!
LOOSE WALL HANGINGS
 You could sew a fabric sleeve at the top of the tapestry and slide the rod through as shown above….. In some cases another rod can be added to the bottom of the wall hanging to keep it taut, and to add a decorative touch. OR you could sew Velcro to your finished wall hanging and attach it to a Velcro-stapled wood strip on your wall. |
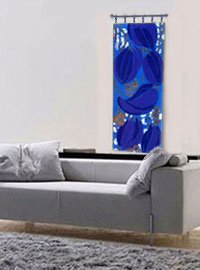 Another idea is to add wool felt as an interfacing to the back of the tapestry to serve as padding, and give it depth. |
NOTE: Decorative Rods and finials come in a great variety of sizes and finishes, both in traditional and contemporary styles for you to choose from, depending on your décor.
STRETCHED WALL HANGINGS
Stretched needlework is supported on two or four sides over a rigid frame. Wall hangings stretched to their full dimensions give the effect of unframed pictures.
You can have your finished tapestry stretched and wrapped around artists’ stretcher bars which come in incremental sizes e.g. 18”, 20”, 24”, 28”, 30” etc., or have a custom wood frame made to fit the finished tapestry dimensions.
You can wrap the exposed frame in fabric in a colour to blend with the hanging…
OR you could sew the finished wall hanging to a larger colour-coordinated fabric backing which would wrap around the frame.
There are several helpful products and special techniques for stretching the canvas on a frame.
NOTE: Needlepoint can also be stretched on sheets of masonite, MDF board, peg board, or plywood as long as the wood is sealed beforehand to prevent acid deterioration of your needlework in time.
Again, have a professional framer or upholsterer do it for you, unless you have experience yourself. They will have the expertise and the correct stretching tools to do the job properly.
TRADITIONAL FRAMING
There are a lot of options to consider when using a traditional frame, whether it’s in wood or metal.
Cost is always a consideration, but be sure to discuss the following options/possibilities with your framer:
- The backing material the framer will be using. Natural wood can cause acid deterioration to your needlework in time. (brown spots, brittleness). The wood should be coated with polyurethane varnish or shellac first to combat this.
- Framing material, width and colour including type of mat to complement both your needlework and your décor
- Museum glass (most expensive) vs non-glare glass vs standard glass. Or maybe you prefer to have no glass.
- You don’t want the glass to touch the needlework. Your canvas and yarn are natural fibres, so they have to 'breathe'. Your framer can use spacers with regular frames or consider shadow box frames which are deeper.
Lots of methods and styles to consider!
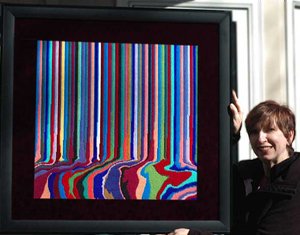
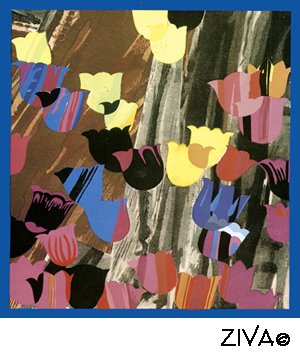
For example, one of my clients (at right) had framed her ‘Poured Colours’ tapestry with a deep burgundy suede mat and a frame in flat black with a thin line of polished black around the edges.
The textures, colours and materials of the needlework, mat and frame complement one another perfectly!
As you’re making your decisions about how your needlework is to be made up, keep focused on where it’s going in your home and your overall colour scheme.
HOW DID YOU FINISH YOUR NEEDLEPOINT PROJECT FOR YOUR HOME?
Share What You Have Learned!
How did you finish the edges of your needlepoint carpet?
Do you have a favourite way of finishing the back and edges of your cushion?
What method did you use for finishing your needlepoint art?
How did your upholsterer finish your seat bench?
Share your experiences or tips on the needlepoint project you finished for your home! We would love to learn about what you did!
You’ve done it! Congratulations! Now take care of it... it’s precious!
TIPS ON HOW TO CLEAN NEEDLEPOINT
• Wool needlepoint will not require very frequent cleaning. From time to time, I do vacuum my pieces lightly with the upholstery attachment of the vacuum cleaner, to get rid of the dust.
• I have read that some people actually wash their tapestries, but I don’t advise it .
Once washed it will be less resistant to dirt.
Washing will also take out the dressing from the canvas, which is needed to help keep it straight.
• A good spray with a reputable dirt repellent will give added protection, and will save the day if anything is spilled on it.
But test it first! They don't always cover uniformly and can change the colour of some yarns!
• If you do need to clean it, however, it is best to have it dry cleaned at a reputable dry cleaner.
I hope my experiences on finishing and sewing needlepoint have helped you!
When determining how to finish a needlepoint project, it really does depend on your skills and confidence. If in any doubt, talk to or hire a professional.
You don’t want to jeopardize all your efforts right at the end! What you’re creating will last for generations...do it right!
Before you take on sewing needlepoint, click here to learn How to Block it!
Click here if you need to review how to start needlepoint projects.
Click here for learning the basic needlepoint stitches.
Now you know our experiences sewing needlepoint, check out the needlepoint designs from the ZIVA Collection at our Home Page
Like This Page?


Translate any page on this site to your language!


NEW!
'MATISSE TRIANGLES' CUSHION DESIGN

NEW!
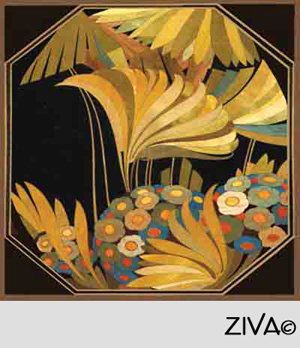
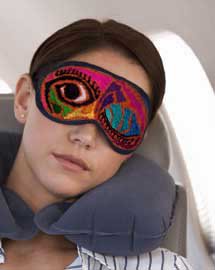
FREE ART DECO CELL PHONE OR GLASSES CASE DESIGN

NEW!

NEW!
THREE FREE
ANCIENT CHINESE CUSHION DESIGNS

NEW!
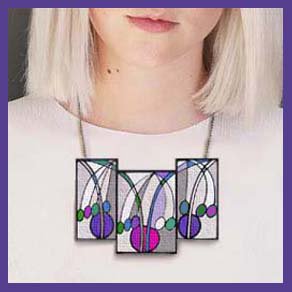
THREE FREE
ART NOUVEAU
CUFF BRACELETS DESIGNS

NEW!
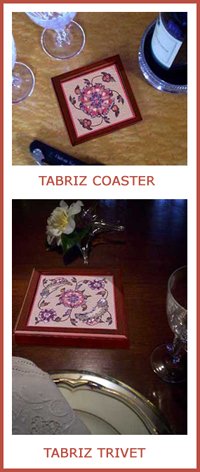
TWO PERSIAN
OR

NEW!
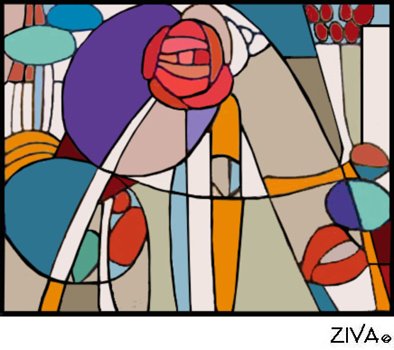
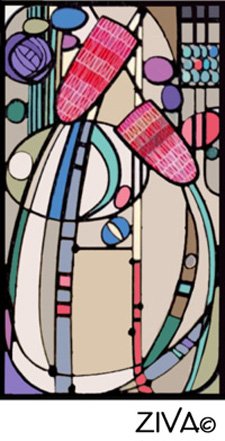
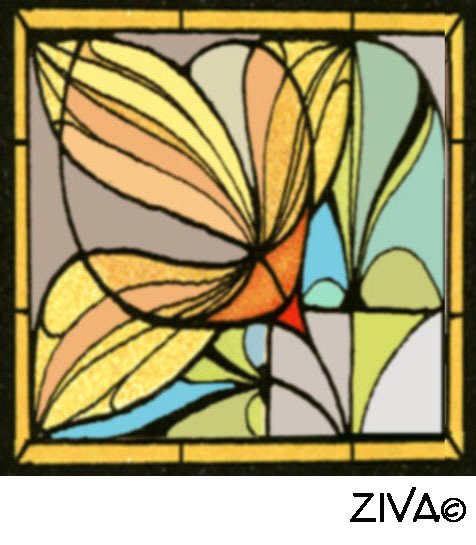
GAUDI'S STAINED-GLASS CUSHION DESIGNS
NEW!
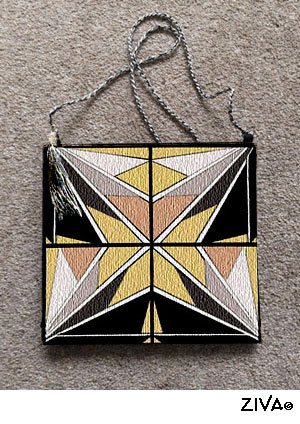
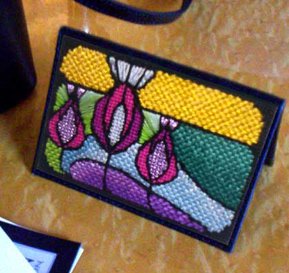
ANOTHER MACKINTOSH INSPIRED DESIGN!
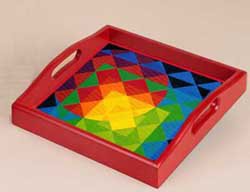
WITH MANY USES...
TRAY, FRAMED, CLUTCH BAG OR CUSHION!
TWO MORE
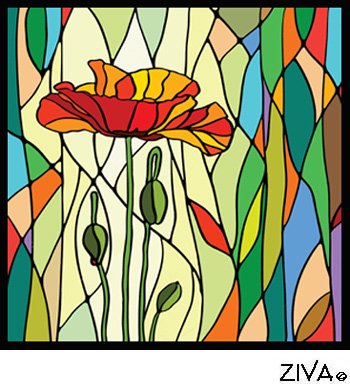
STAINED-GLASS DESIGNS
FOR CUSHIONS
TWO MORE
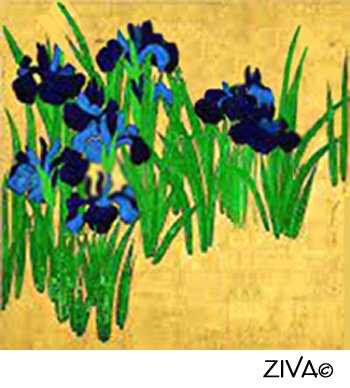
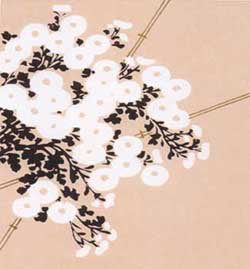
JAPANESE DESIGNS
FOR
OR
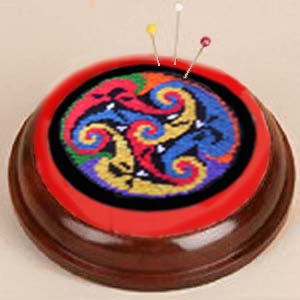
FOR YOUR WRIST OR ON A BASE
YOU CHOOSE!
MORE!
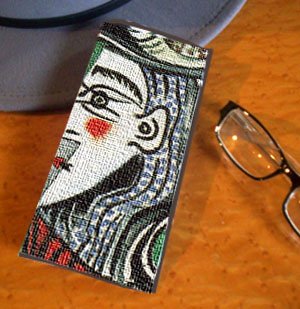
INSPIRED BY A PICASSO PAINTING!
FOUR MORE
FRENCH COUNTRY DESIGNS
FOR
OR
MORE!
NEW!

NEW!
NEW!
NEW!
NEW!
INSPIRED BY MACKINTOSH!
NEW!
NEW!
MORE
MORE
STAINED GLASS CUSHION PATTERNS

NEW!
FOR CHRISTMAS STOCKING!
NEW!
INSPIRED BY PICASSO!
FOR A COIN PURSE OR CARD HOLDER
NEW!
FOR CUSHIONS

FOR LOTS OF MAKING UP IDEAS!
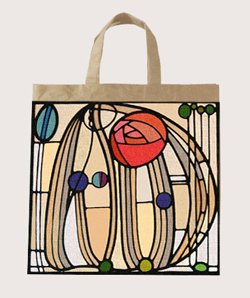
FOR TOTE BAGS OR HANDBAGS
FOR NEEDLEPOINT ART
IN THE PRAIRIE STYLE!
INSPIRED BY
MATISSE!
INSPIRED BY
GUSTAV KLIMT!

INSPIRED BY
MACKINTOSH!
CUSHION DESIGNS
'MY FRENCH COUNTRY' SERIES